

Note - Mac users; Control-click on a Mac is similar to a right-click on a Windows computer. Press and hold the Control key while you click an item.
See this article regarding risks associated with scaling.
SCALE TO PERCENTAGE
The Scale to Percentage tool is used to scale content to an exact trim size. This is an optional tool a user can use if an exact scaling percent is required.
IMPORTANT: When applying scaling, it is ALWAYS centered to the center of page.
To access the Scale to Percentage tool, check the box next to Scale by Percent (optional).
A new box will appear allowing the user to enter a target scale percent.

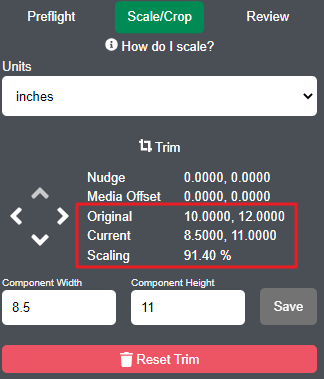
Click on the blue Scale to % and Center button. A popup dialogue box will appear to allow you to confirm and finalize the desired trim size and percentage. NOTE: In this example, the page will be scaled to 91.4% with a trim width of 8.5 inches and a trim height of 11".

Click Scale & Crop to approve the changes. The user may also enter a new trim width in this box if desired.
Lakeside Scout will direct the user back to the thumbnails view during this process as the scaling changes are being applied.
NOTE: Only the page that was adjusted will be processed at this time.
Once this is finished processing, a new thumbnail will be generated at the new scaling/trim size.
NOTE: At this point, only that page has had the adjustment applied. The adjustment will need to be applied to all pages if this component contains more than 1 page.

Use the Measure tool to check margins or confirm adjustment. See the Measure Tool article for details.

DOWNLOAD LOW-RES or HIGH-RES (optional)
Optionally, a copy of the adjusted page can be downloaded. Right-click on the page and choose Low-res or High-res download. This could be used to measure margins or confirm adjustment is applied as intended.
APPLY ADJUSTMENT TO ALL PAGES
After applying the scaling to 1 page and confirming the changes are as intended, the adjustment may need to be applied to all pages depending on component type (text for example will require all pages to have the same trim dimensions).
This screen grab indicates scaling and a new trim size have been applied. Notice the original size and new size once scaling has been applied.
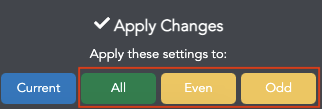
To apply the scaling/trim settings to all pages, double-click on the thumbnail of the page that already had the adjustment applied. At the bottom right of the scale/crop tab, there are options to apply these settings to:
All - Adjusts all pages in the container to this trim
Even - Adjusts only even pages in the container to this trim
Odd - Adjust only odd pages in the container to this trim
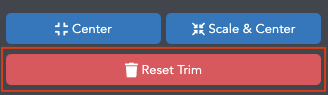
RESET TRIM (Undo)
If the results are not as desired, clicking the reset trim button will undo the adjustment and return the trim box and scaling back to the original dimensions of the file.
NUDGE/MOVE TRIM BOX
If auto centering the trim isn't the desired result based on page layout, auto center of the trim can still be used. A manual movement of the trim box may be required after applying.
Use the arrow buttons to move the trim box by 1 pt. per click. This will shift the entire trim box in the direction of the arrow.

In this example, the trim box was adjusted to move .125" (9 points) to the right.

NOTE: The change will not take effect until "Apply these settings to:" Current, All, Even, or Odd has been clicked.
